
We’re now well into the time of year when the shops are filled to the brim with decorations. And, let’s face it, most of the autumn and Halloween decorations are gone and replaced by Christmas just when you start thinking about them! We’re also very aware that everyone is going to be feeling the pinch this winter. And with that in mind we’ve put together tutorials for three budget friendly autumn crafts. Get ready to upgrade your autumn home décor!
These projects can mostly be made using found and recycled materials, including sticks, packaging/envelopes and old clothing. They are also really fun projects to do with the kids (taking extra care when using scissors and sewing), and are fairly quick to complete.
Click on the project buttons above to jump to the project you’d like to start with. Let’s get crafting!
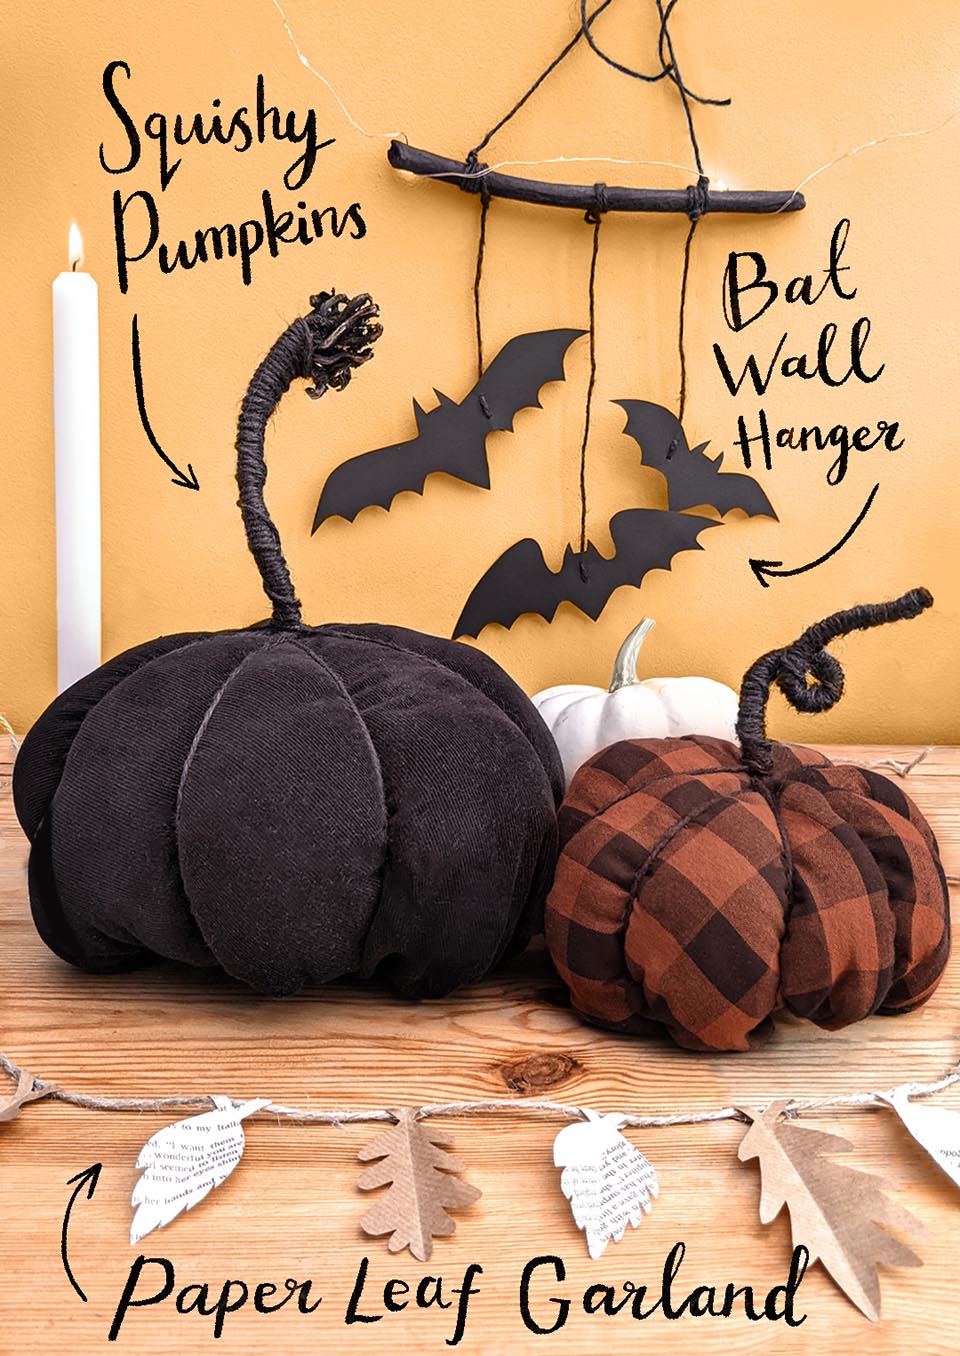
Squishy Pumpkins

These soft, squishy pumpkins are so much fun to make and look wonderful dotted around the house for Halloween!
They’re also a great way of recycling the fabric from damaged or old clothes. Stuffing can be salvaged from old cushions or pillows that are passed their best. And kids will have great fun hunting for the curliest or most crooked stick to create the stalk!
Materials & Equipment:
Fabric (roughly square shaped)
Stuffing
Needle and thread
A stick (you could also use wire)
Long piece of thick twine or string
Strong glue (optional)
Scissors

1. Place your stuffing in a rough ball shape in the centre of your fabric.
2. Bring all the corners of the fabric into the centre to wrap the stuffing up tight.

3. Flip so the corners of the fabric are on the bottom and find the centre point on top of your pumpkin. Cut a small slit for your stalk.
4. Push the stick through the hole and through the stuffing. The stick should be held in place.

5. Turn the pumpkin back over. Use a needle and thread to stitch all of the corners together. This doesn’t need to look neat but does need to tightly hold the stuffing inside!
6. Trust the process, we’re halfway there!

7. Give the pumpkin a good squish to plump the stuffing into shape.
8. Take your twine and loop it around the stalk. Bring either end out to the sides of the pumpkin, then tie tightly at the bottom.

9. Turn the pumpkin 90 degrees and bring the twine back to the top. Tie tightly around the stalk. The twine should now appear to create four segments on the pumpkin.
10. Repeat this process again to create eight segments.

11. When this is done, tie the twine securely at the base of the stalk.
12. Take one end of twine and wrap the stalk. When you reach the end of the stick, tie or glue the end of the twin in place so it doesn’t unravel. Trim any loose ends with scissors.
Paper Leaf Garland

The next project in our three budget friendly autumn crafts is this paper leaf garland. It is so simple to make, can be made using scrap paper and looks gorgeous hanging in the window! You can make your garland as long as you like depending on how much time and twine you have – we recommend at least a metre long for the best effect.
For inspiration it can be helpful to take a look at some autumn leaf silhouettes.
Materials & Equipment:
Paper
Scissors
Twine
Glue
Pencil

1. To start, draw out some roughly symmetrical leaves in your notebook. At the top of the leaf add a diamond shape with a cut out centre (see photo above). This will be used to attach your leaf to the twine.
2. Draw your leaves out onto the scrap paper in pencil and cut out with scissors.
3. Keeping the pencil outline at the back, fold each leaf in half vertically towards you. Fold the diamond at the top of the lead in half away from you to create a hook (see photo above).

4. when you’re happy with the amount of leaves you’ve prepared, lay them out next to your twine to check the length and arrangement.
5. After that, you can attach the leaves by adding a dot of glue (a glue stick is best!) to the point of the diamond that is folded back and sticking it to the back of the leaf. This should allow you to still move and adjust the leaf on the twine.

6. Now hang up your paper leaf garland and enjoy!
Bat Wall Hanger

An easy-peasy Halloween project, perfect to try with the kids! If you fancy you could jazz up the bats with glitter, googly eyes, or whatever you like.
Materials & Equipment:
Black paper
Twine or thread
Stick
Scissors
Pencil
Black paint or ink
Optional: Glitter, googly eyes, stickers etc.

1. Grab your notebook and draw what you’d like your bat wall hanger to look like.
2. Next, paint your stick black and leave to dry.

3. Draw the outlines of you bats onto your paper.
4. Carefully cut your bats out with scissors and arrange them on the table top as you’d like them to hang.

5. Now poke two holes in each bat with a pencil. If you’d like your bats to hang at an angle, poke the holes to one side. The holes should be in a vertical line from where you’d like to attach the twine to the stick.
6. Now thread the twine through the top hole in back of the bat, loop back through the second hole and tie a knot in the twine to hold it in place. The knot should be on the pencil side of the bat. Repeat for all bats.

7. Next, tie the twine from each bat onto the stick. This works best if they are evenly spaced and the knot sits underneath the stick.
8. Finally, tie a last piece of twine to either end of the stick and tie in the centre to create the hanger.
8. Additionally you could go on to decorate your bats however you choose or hang it straight up!
And those were our favourite three budget friendly crafts for autumn. We hope you have a great time trying one or all of these this October. Also, we would love to see what you create so please share your decorations with us on social media. Happy crafting!
Don’t forget you can buy any notebook from our Autumn and Halloween collections for half price when you use code HALLOWEEN at the checkout!
For more ideas on seasonal activities, take a peek at our Autumn Foraging blog post here.


